In this post, I am going to walk you through every step to build a research personal website from scratch and deploy it on Github using [this] template. This template is built on top of Astro [1] Astro - The web framework for content-driven websites. 2024 and astro-micro [2] T. Willison. Astro Micro: a minimal Astro theme. 2024 .
Prerequisites
- VSCode
- Node.js and Npm [Install Here]
- Node.js: v18.17.1 or v20.3.0 or higher use
node -vto check your node version. - Npm package manager: check version with
npm -v
- Node.js: v18.17.1 or v20.3.0 or higher use
- Git: Make sure git is installed by running
git -vin your terminal.
Installation
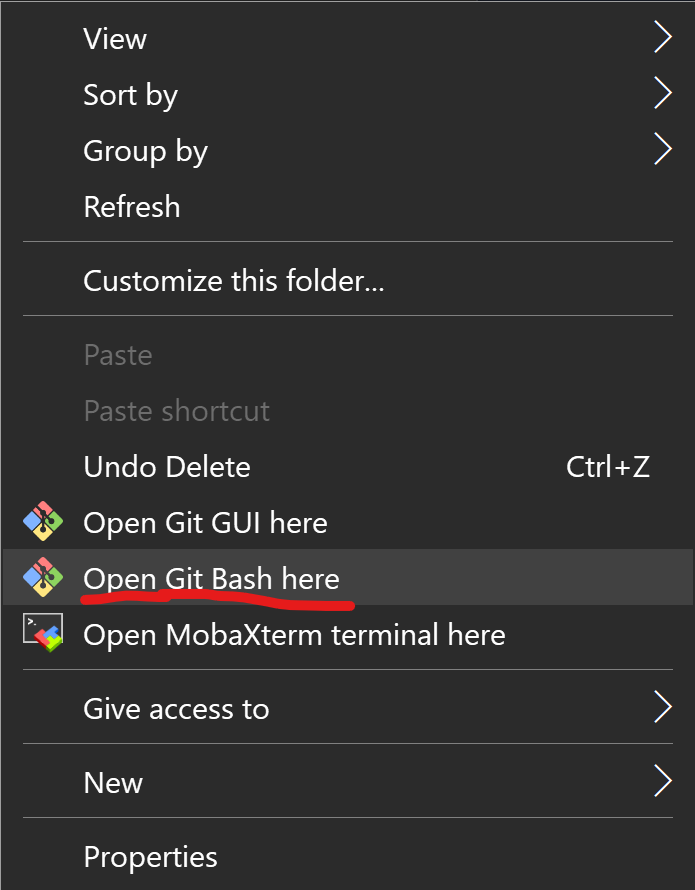
Create a new folder for your code and in side the folder, right click to Git bash here.
Clone the repo in the bash
git clone https://github.com/jingwu2121/astro-micro-academic.git
Open the folder in VSCode, and enter the repo in the terminal
cd astro-micro-academic
Install all the required modules, which are listed in package.json.
npm i
Run the local server, and click the localhost link in the terminal.
npm run dev
File Structure
I would like to introduce a bit more about Astro if you are super new to front-end development.
Astro is a component-based Static Site Generator, just like react, where everything is a component, which can be reused to avoid redundancy. For example, we will have a Header and Footer component, and we just add them on every page, instead of keeping repeating headers and footers on every page.
Here, the public folder includes public assets on your website, e.g. images, which can normally be downloaded directly from the website. src folder contains all the codes and your blog posts for the website, which are invisible to website viewers. However, here, we are going to deploy our website on github, so all the files are actually public. (Unless you have a Github Pro Account)
componentscontains different ‘react’ components of the website, which is reusable.contentcontains your posts.layoutscontains a universal layout for the website.pagescontains different pages.stylesstores the CSS files. (This project all uses TaillwindCSS framework)
|-- public
|-- src
    |-- components
    |-- content
    |   |-- blog
    |   -- publications
    |-- layouts
    |-- lib
    |-- pages
    |   |-- blog
    |   |-- publications
    |   -- tags
    |-- scripts
    |-- styles
Modify the Website Content
Website Content
Now that you have basic understanding for the file structure, it should be easy for you to change the content of the website to make it yours. 😏
I link files to different pages here, making it easier to modify the website as you like.
- Header:
src/components/Header.astro - Footer:
src/components/Footer.astro Homepage:src/pages/index.astroblog:src/pages/blog/index.astroresearch:src/pages/publications/index.astrocv:src/pages/cv.astroabout:src/pages/about.astrotags:src/pages/tags/index.astro
Also play around the explore more and customize your website. 😆
Update Your Posts
Store your blogs and publication cards in src/content/blog and src/content/publications as either Markdown files or MDX files. If your are not familiar with the Markdown Syntax, we have an example here and one for MDX, created by Astro-Micro.
Make sure to structure your blog as this and update the metadata as well. All the posts are sorted by date as a descending order. For publication cards, follow the example in the template repository. Do not remove paperURL, codeURL, webURL, dataURL, even if you don’t have the URL, just leave the link part blank, e.g. codeURL: "Code: " then it won’t appear on the website. Note that, there is a space after the colorForIntegration.
Deploy Your Website
Congratulations!! Now you have your website running locally! Wanna make it visible to the world? You need to deploy your website. There are several solutions to this. The most common way is to deploy to Github. Besides this, you can also deploy it to hosts like Vercel or Netlify. More information here. They have free plans for you to use.
Here, we are going to deploy the site to Github using Github Action.
Build & Preview
You can build your website locally and preview it by running
npm run build

npm run preview
After building the website, all the auto generated HTML files will be stored in dist folder.
Config
Now, let’s actually deploy the website, first configure your astro.config.mjs.
import { defineConfig } from 'astro/config'

export default defineConfig({
  site: 'https://<username>.github.io',
  base: 'my-repo',
})
Remove the base argument if you are going to deploy to the root. With the base, you will deploy the site you my-repo repository and eventually your website link will be https://<username>.github.io/my-repo
Deploy Script
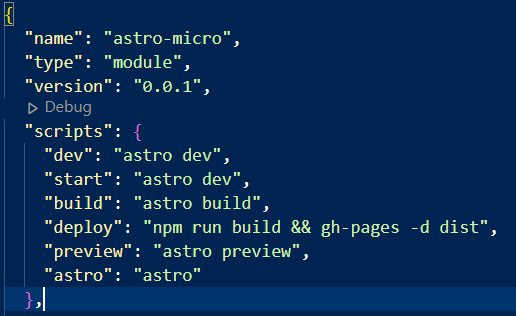
Then, add the deploy script to your package.json
"deploy": "npm run build && gh-pages -d dist",
Github Action
Then, add Github Action Workflow to your repo. Create a new file in your project at .github/workflows/deploy.yml and paste in the YAML below. What Github Action does is to repeat the npm run build in the Github site, which will generate something like dist folder as well. But in this case, this generated ‘dist’ folder has a seperate branch gh-pages after building the website. Your website runs on this branch.
name: Deploy to GitHub Pages

on:
  # Trigger the workflow every time you push to the `main` branch
  # Using a different branch name? Replace `main` with your branch’s name
  push:
    branches: [ main ]
  # Allows you to run this workflow manually from the Actions tab on GitHub.
  workflow_dispatch:

# Allow this job to clone the repo and create a page deployment
permissions:
  contents: read
  pages: write
  id-token: write

jobs:
  build:
    runs-on: ubuntu-latest
    steps:
      - name: Checkout your repository using git
        uses: actions/checkout@v4
      - name: Install, build, and upload your site
        uses: withastro/action@v2
        # with:
          # path: . # The root location of your Astro project inside the repository. (optional)
          # node-version: 20 # The specific version of Node that should be used to build your site. Defaults to 20. (optional)
          # package-manager: pnpm@latest # The Node package manager that should be used to install dependencies and build your site. Automatically detected based on your lockfile. (optional)

  deploy:
    needs: build
    runs-on: ubuntu-latest
    environment:
      name: github-pages
      url: ${{ steps.deployment.outputs.page_url }}
    steps:
      - name: Deploy to GitHub Pages
        id: deployment
        uses: actions/deploy-pages@v4
Finishing Your Github Repo Setting
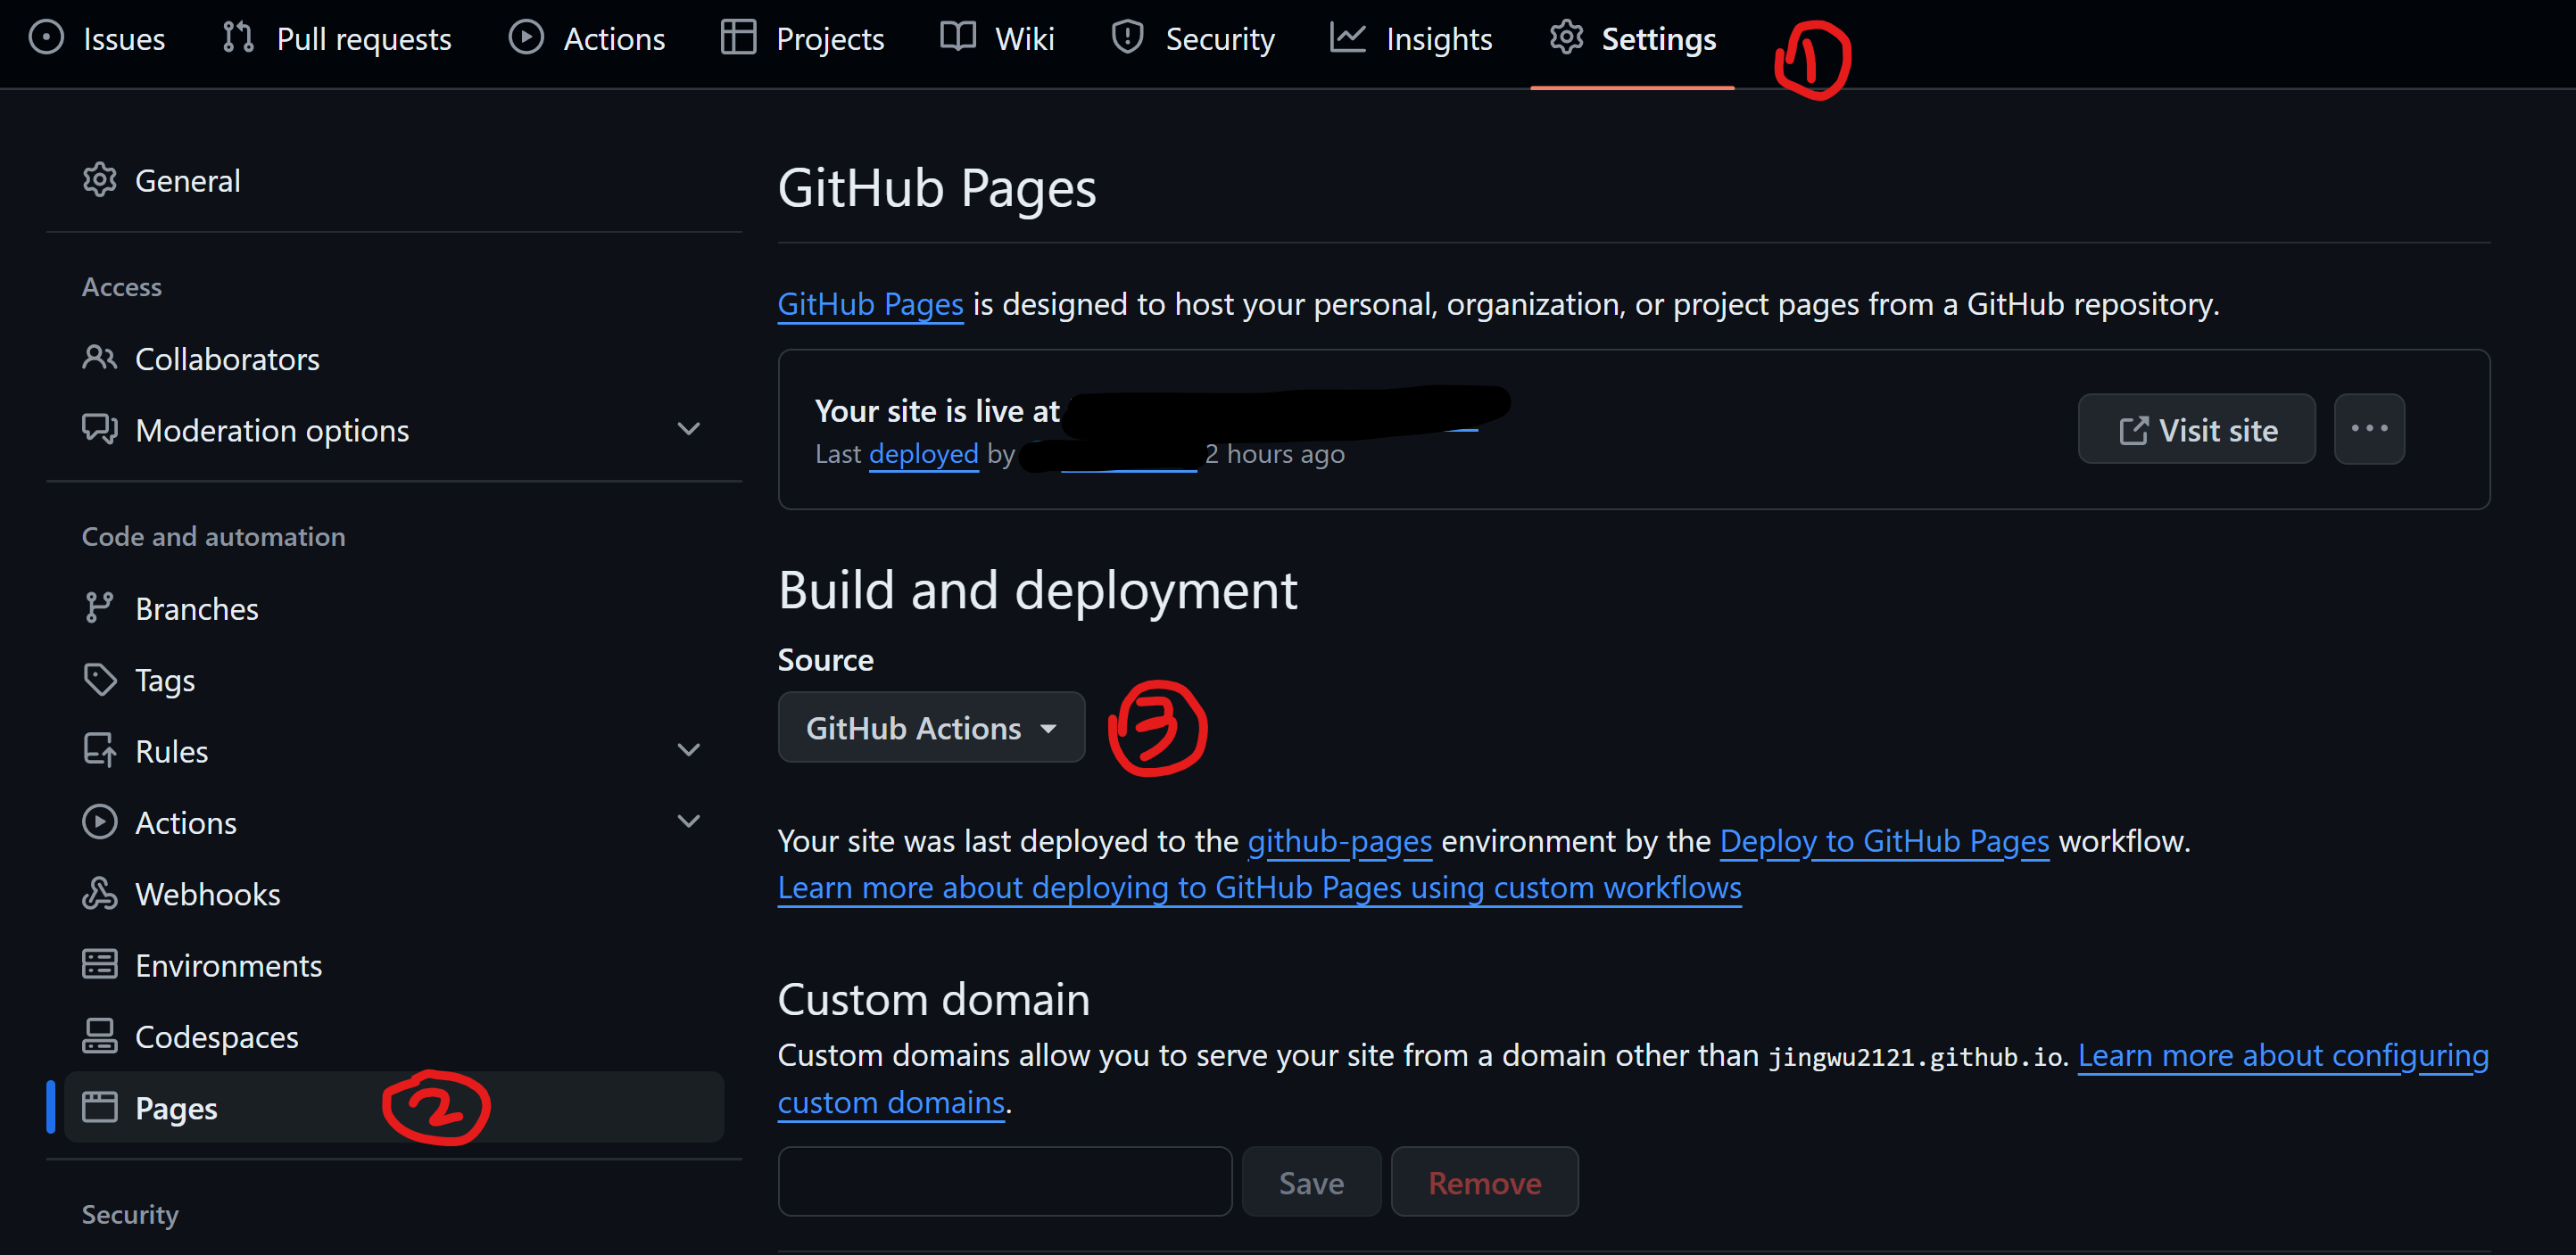
Now go to your repo Settings, under the Pages table, in Build and deployment, source, select Github Actions.
Push your code 😆
Now, push your code, the site will automatically starts building and deploying. Navigate to Actions tab to see the progress.
Congratulations!! 🎉 🎉
Go to https://<username>.github.io or https://<username>.github.io/my-repo to have a look at your live website!
Make Your Website Visible to Google
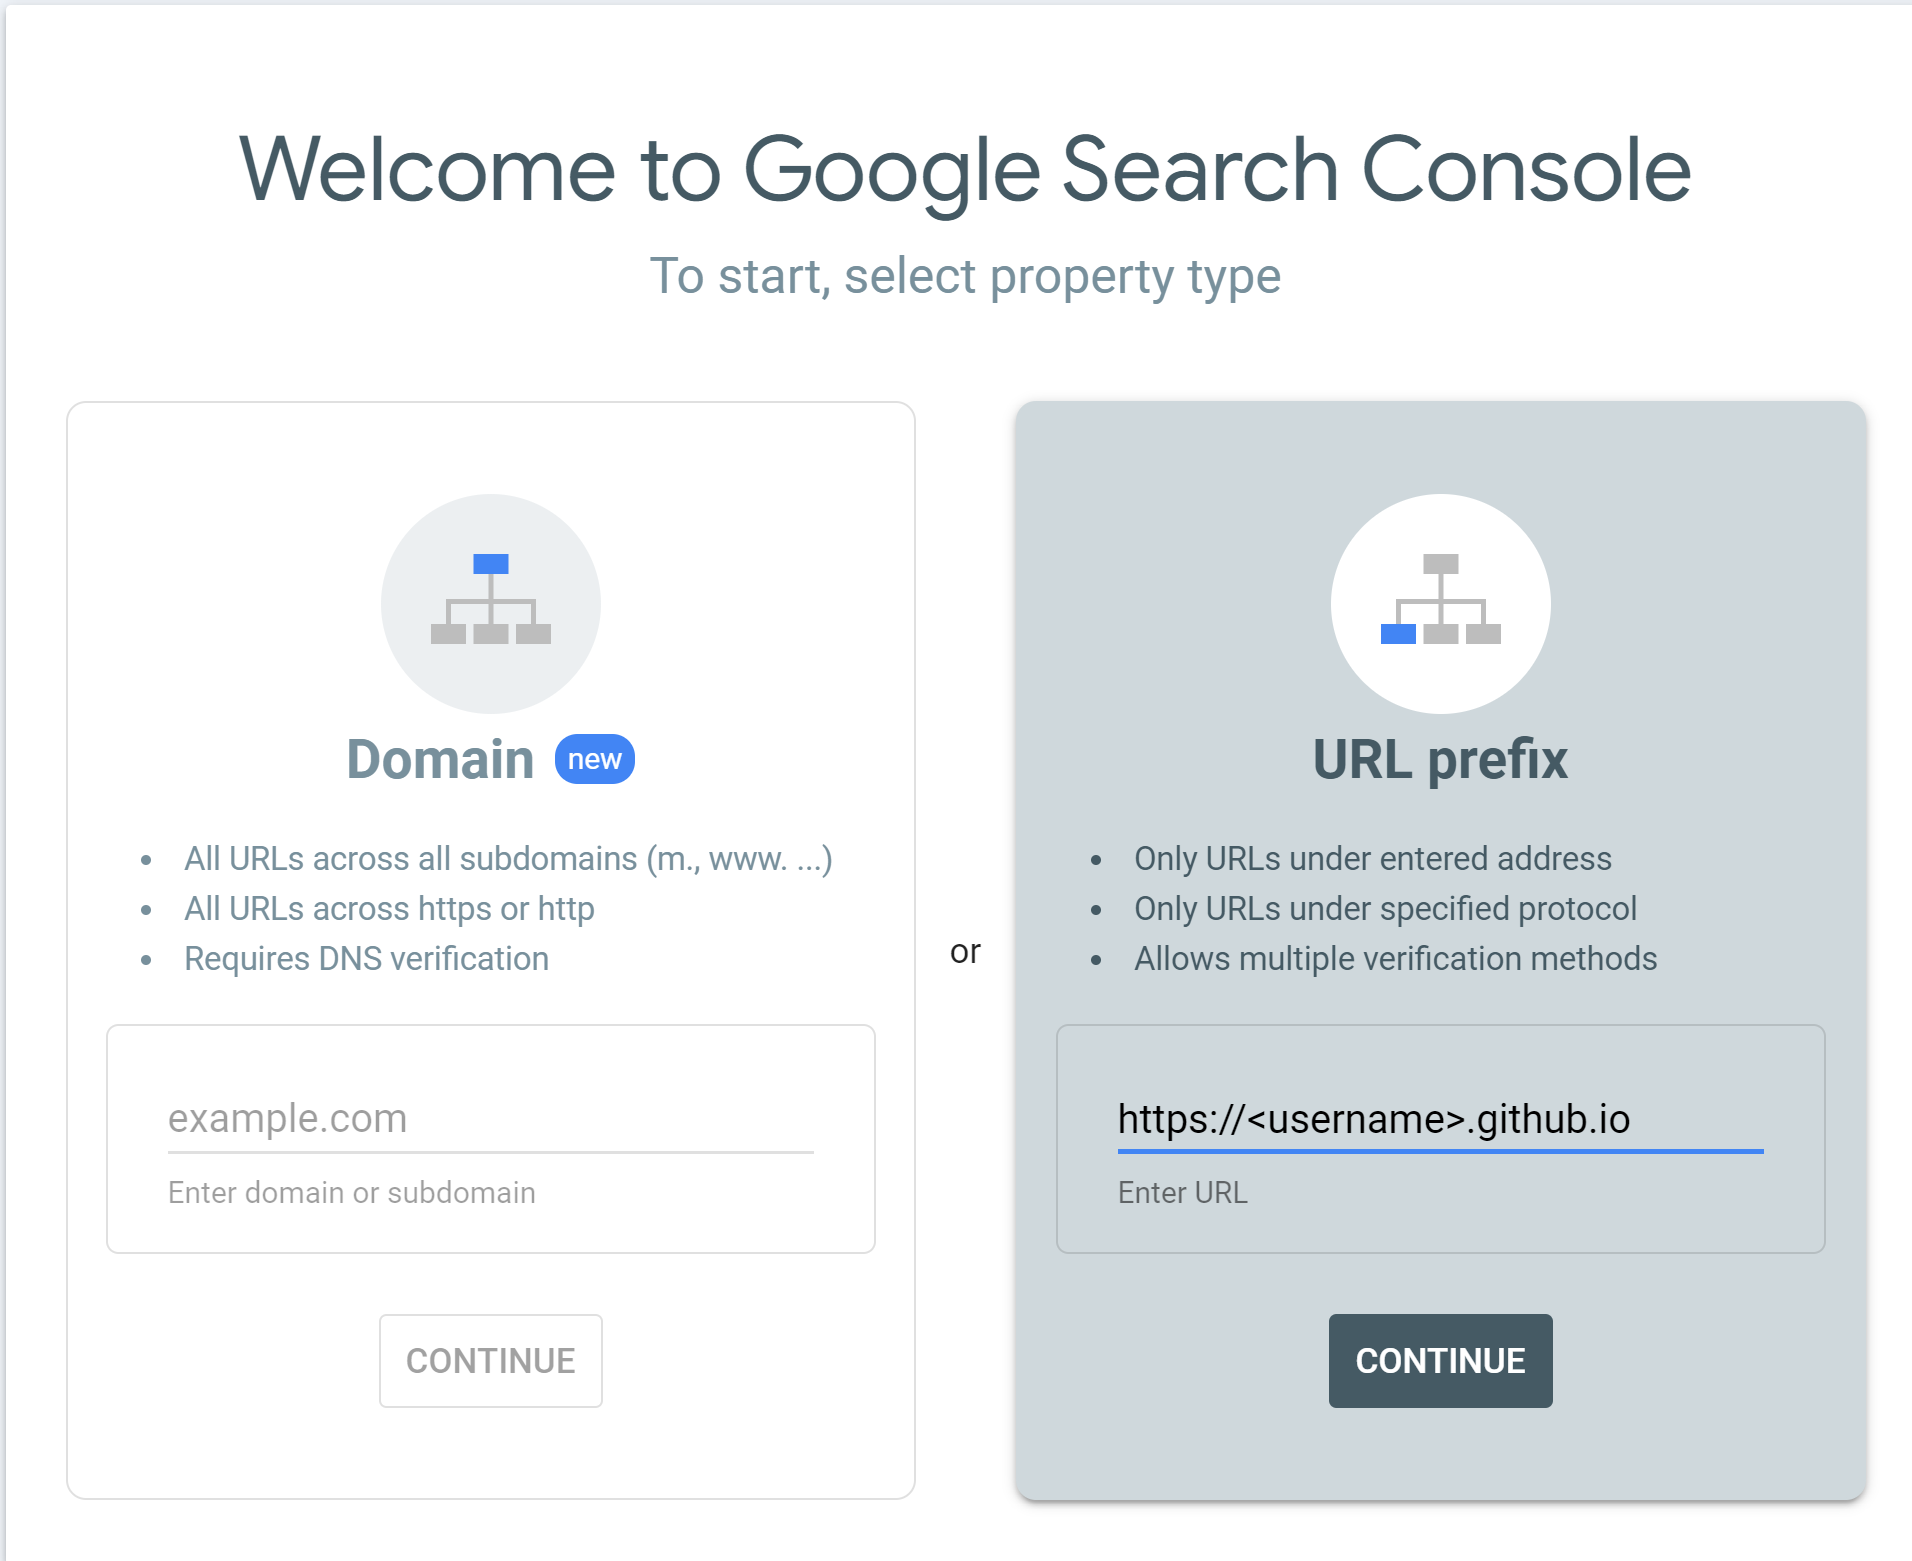
If you are not able to search your website on Google, you might need to add your website manually in Google Search Console. (Skip this if your site already shows in Google search results). To do this, go to Google Search Console, click start, then you should have this page. Fill in your website URL as required.
You will be required to verify the ownership. So follow the instructions in HTML tag, copy the <meta> tag and go to src/components/Head.astro, paste it right before the global metadata.
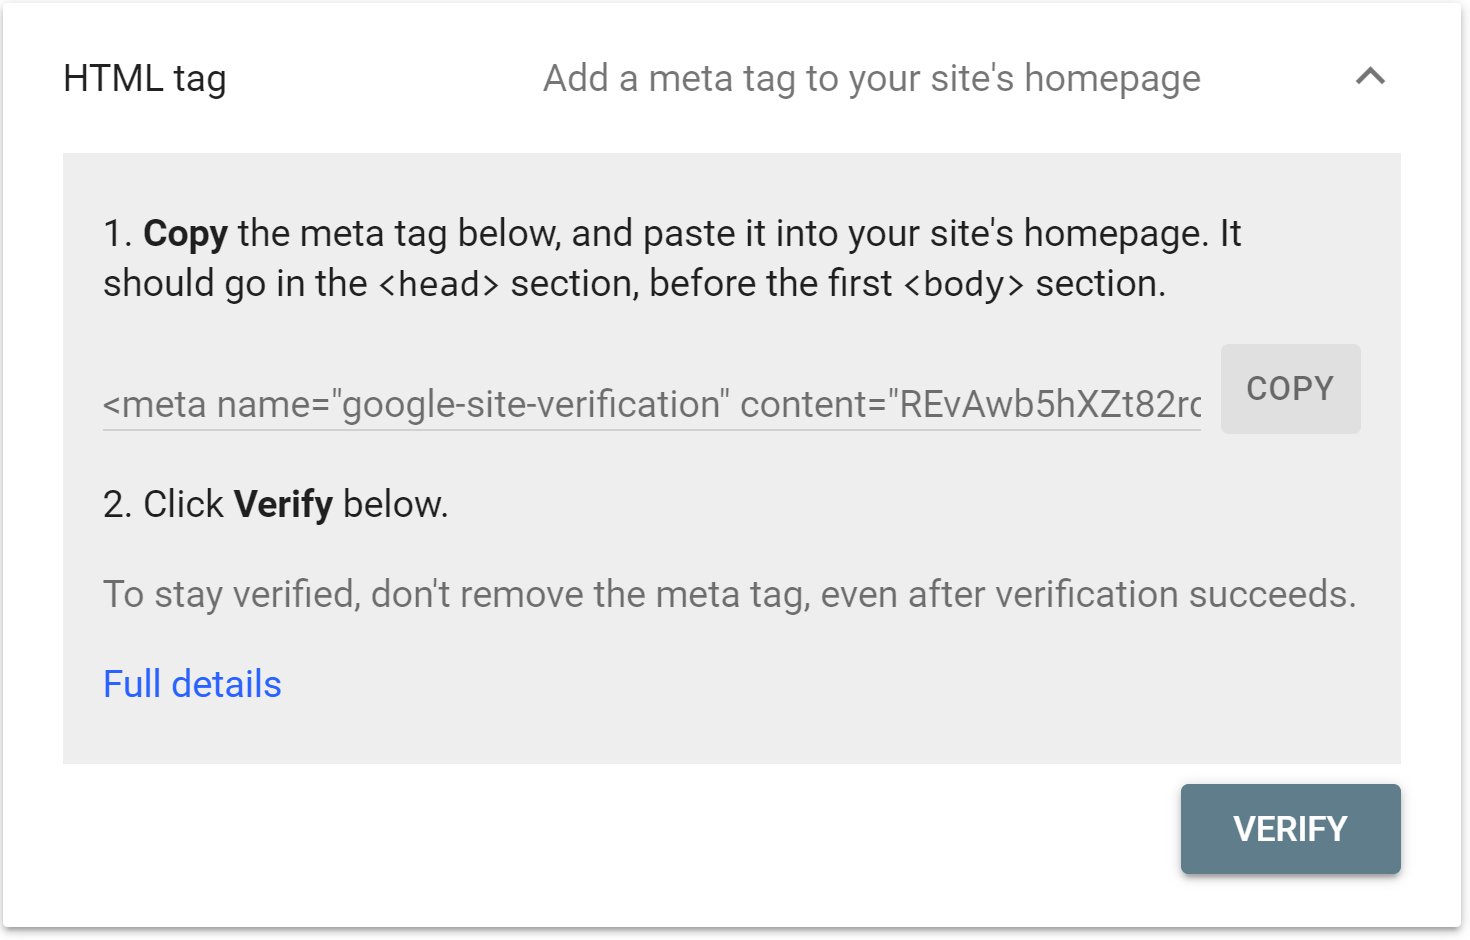
Then, push it into the Github, and click verify. It takes a while to verify and takes days for Google to analyze your website. When it is done, your wensite will appear in the Google search results.
References
- Astro Contributors. Astro: The web framework for content-driven websites astro.build, 2024.
- T. Willison. Astro Micro: a minimal Astro theme 2024.